I will be the very first person to admit how obsessed I am with Pinterest. I think I was one of the first people in my circle to encounter it and years later, here I am with 30k+ pins 😬.
Okay, so maybe that’s a little pathetic…but screw it, I’m embracing it!
Especially since it’s such a terrific source of inspiration for a DIY nerd like myself! I began to do some research on Pinterest for nursery inspo once we found out we were having a boy. I was a bit overwhelmed at first with all the cute ideas I was finding (or had already saved from years past) and had no idea where to start. Eventually I took a step back and decided to concentrate on just picking out a color scheme and then work from there. Honestly, that approach helped the overwhelm so much.
I was still finding so many adorable decor ideas but in time, my creative wheels started spinning and I began to curate my own decor ideas tailored to our baby boy and who my husband and I are and what we like. Once I reached that step, settling on what I envisioned his room to look like came easy peasy lemon squeezy! 🙌🏻
THE DESIGN
I’ve seen yarn tassels adorning my Pinterest feed for years and always thought they were so cute. But I also never really had a purpose or place for them to ever make them. Enter pregnancy! 👋🏻
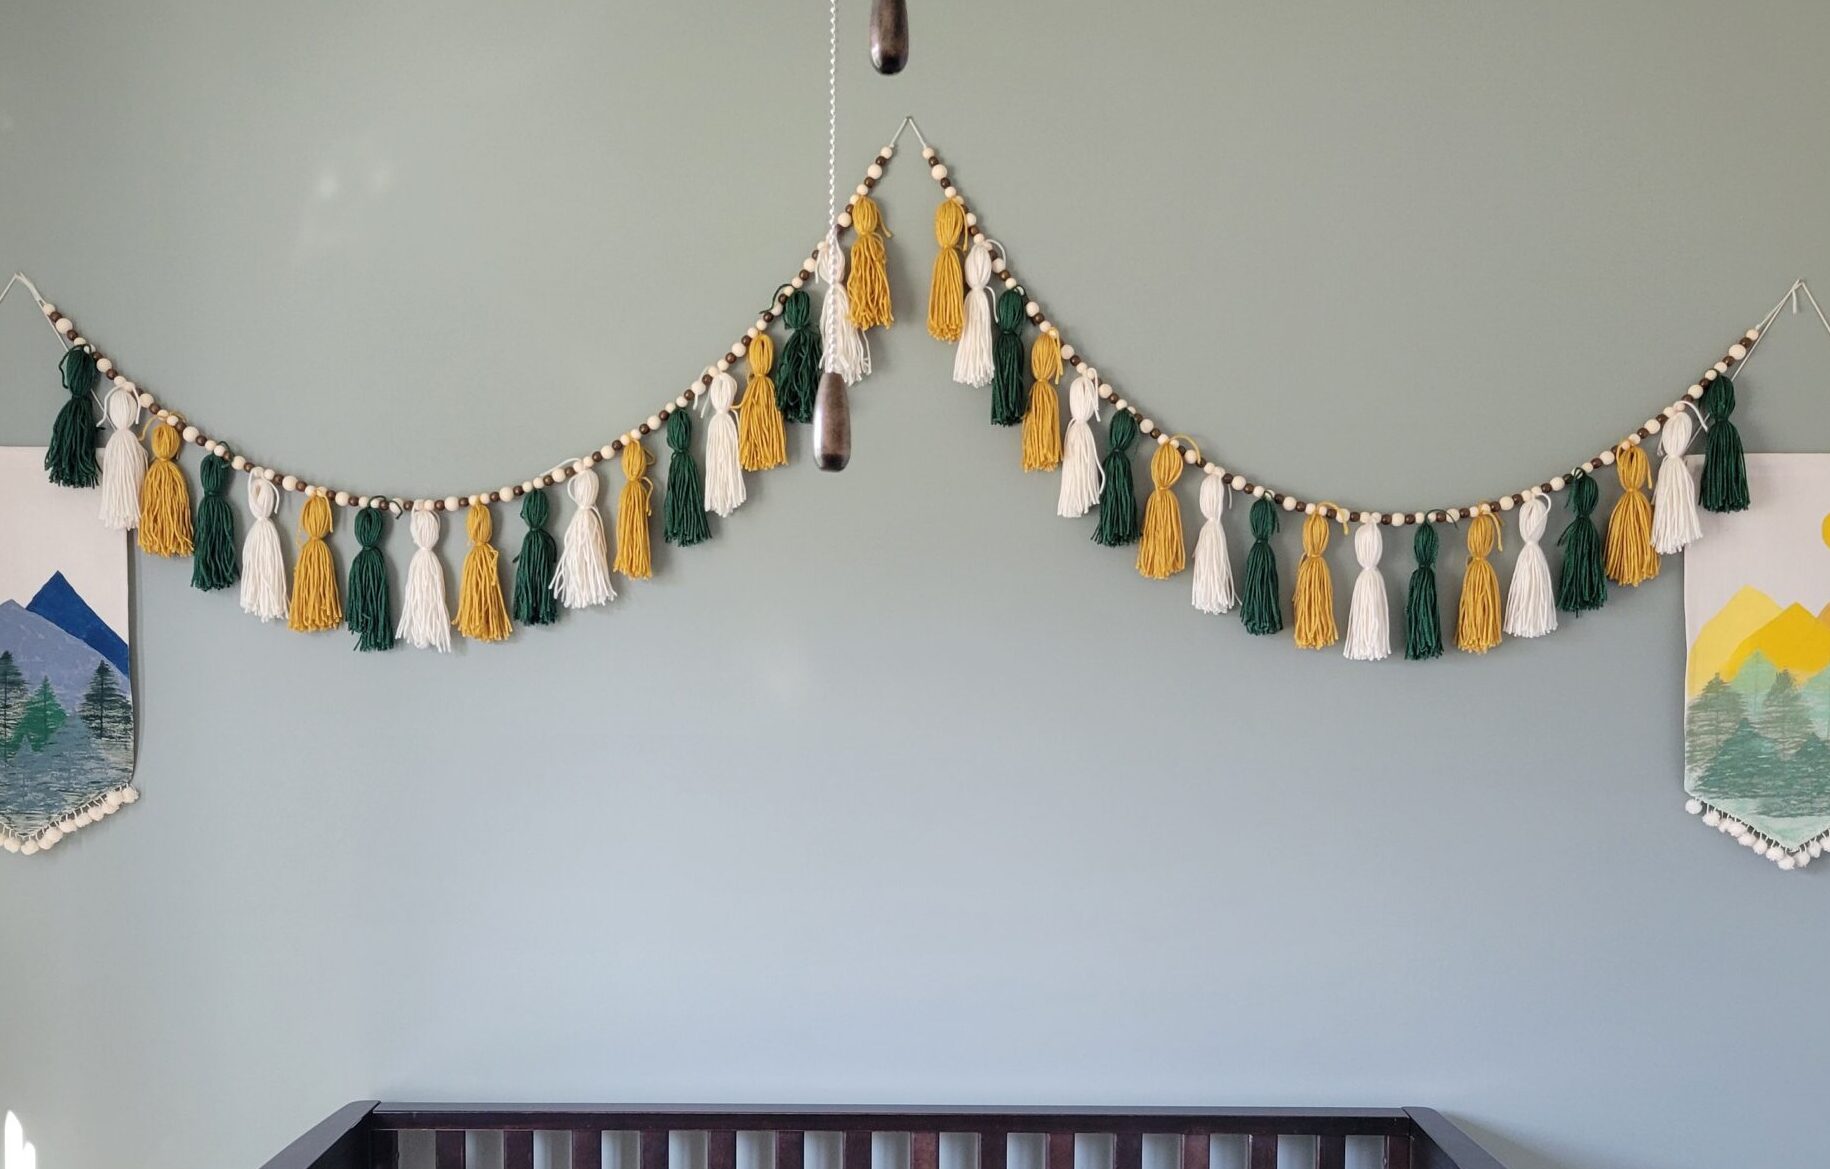
The beaded yarn tassels were one of the first ideas I saved to our nursery board. I even found some that had felt leave cutouts instead of tassels that were fitting for his nature-y themed room but I ultimately decided to keep my first ever tassel creation easy and stick with the basics.
We chose green and cream for the primary color scheme and those two colors became my first choices for the yarn. Along the line, I decided to add a golden yellow color for a subtle accent pop throughout his room and added that color of yarn to my shopping list. I felt that would help break up the super dark green from the super light cream. Since we were also doing an outdoor theme, we kept our furniture search on more natural wood tones which allowed me to select the more natural wood bead colors for the tassel in betweens instead of using more colors from the room scheme.
After locating the measurements I would need for where I was wanting to hang this project, it felt like a bit of an undertaking but was truthfully one of the easiest DIYs I’ve ever done-even being my first time doing it!
THE DIY
MATERIALS USED
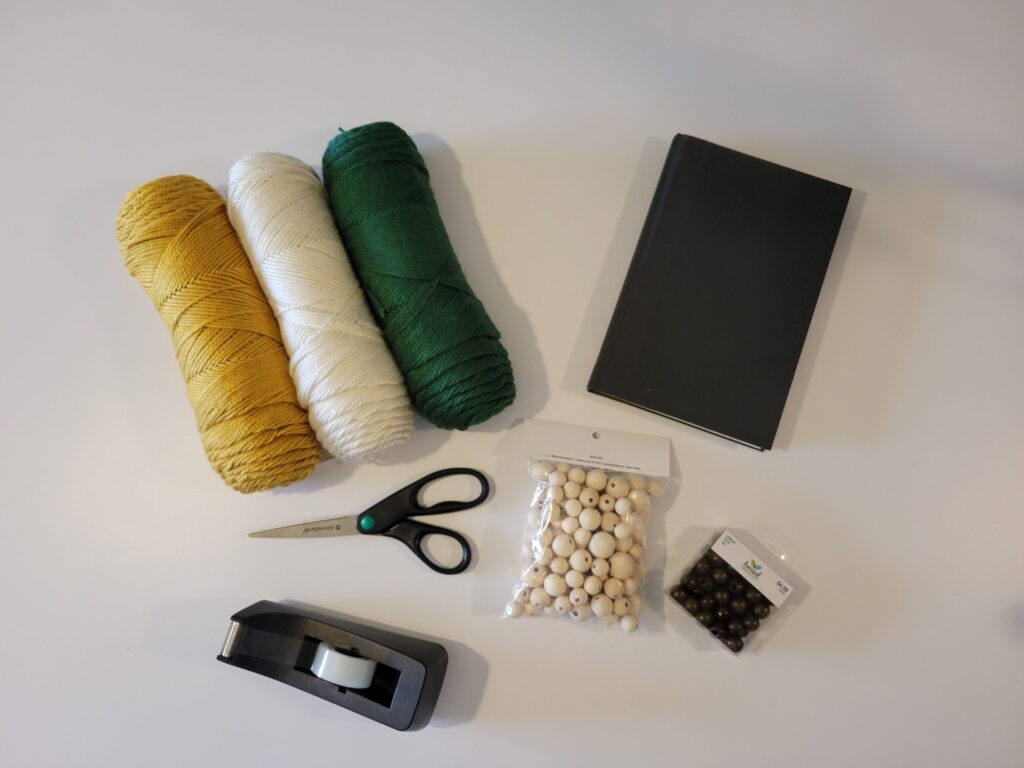
1 – Spool of Yarn for each color you want to use (I used Honey, Forest, and Ivory from this brand)
1 – Tape (I would recommend using masking tape. I didn’t have any on hand but regular Scotch tape worked just as well!)
1 – Scissors
1 – Book or wood block to wrap the yarn around. The book I used was 6 ¼” wide from spine to edge. The size of book or block you choose will specify how long your tassels are.
1 – Medium sized needle (optional, but this helps to feed the yarn through the beads)
THE HOW-TO
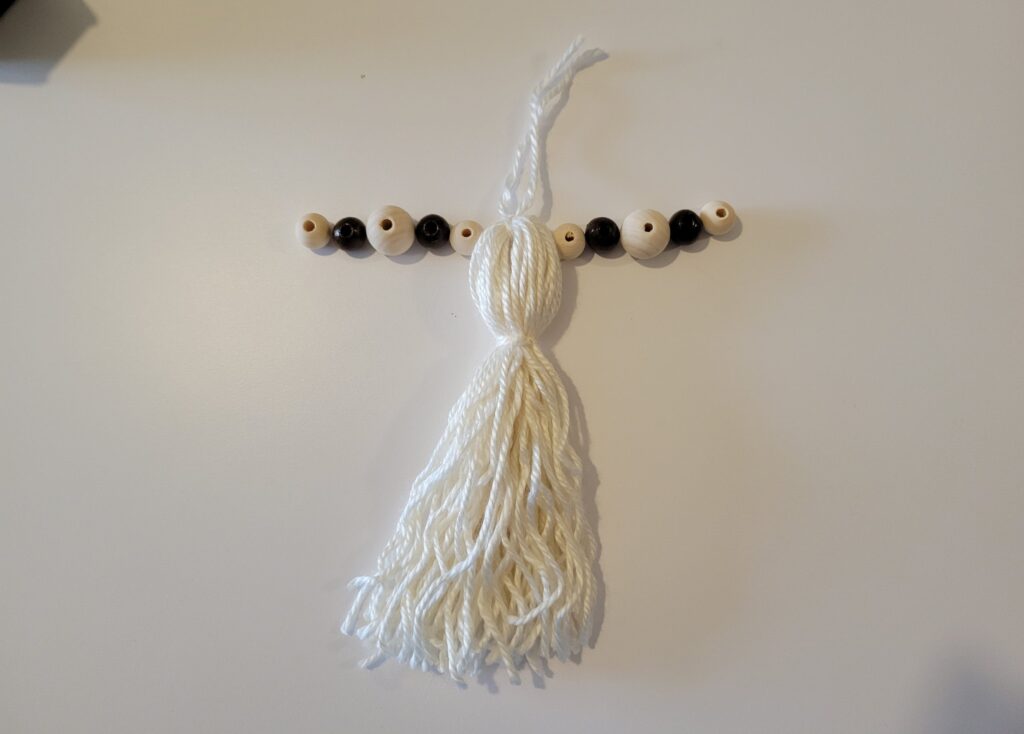
1-First things first-measure the length of the piece and decide how you want your tassels and beads to lay out! This will help clarify how many tassels you need to make and how many beads you will need in total to complete the project.
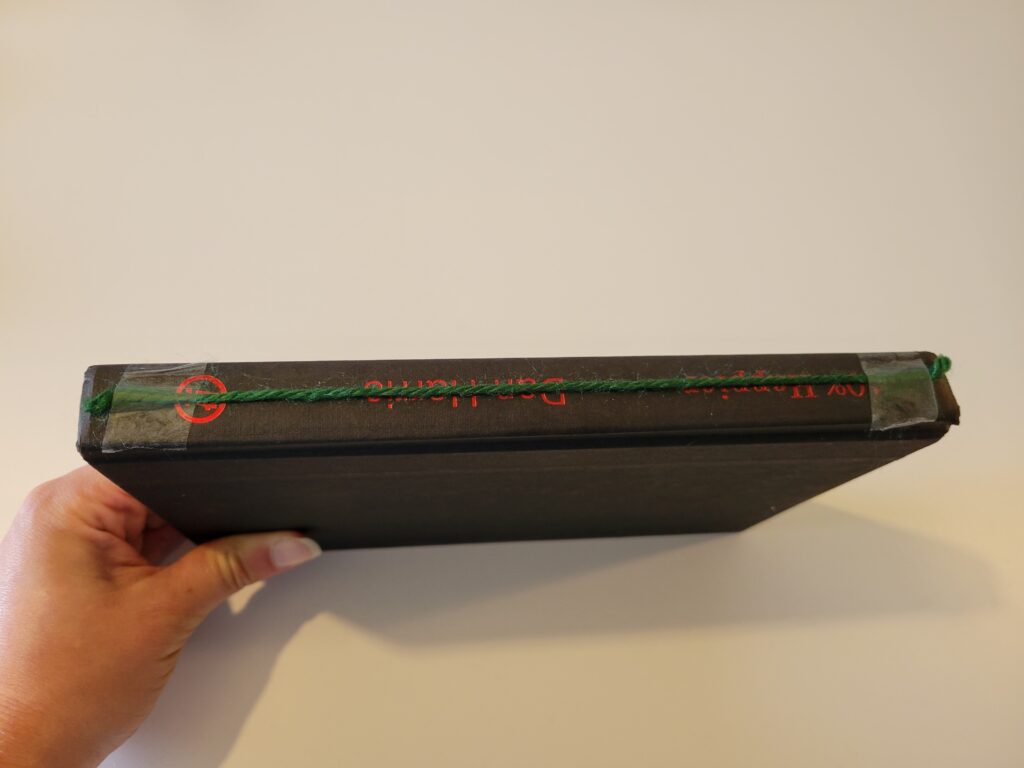
2-Place your yarn along the spine of the book or edge of the block and cut it to that length. Tape each end.
OPTIONAL: I measured the length of this piece of yarn and cut the number of pieces I would need per tassel to wrap the middle. You can certainly do this later at this step, but I found it to be a bit of a timesaver during my process.
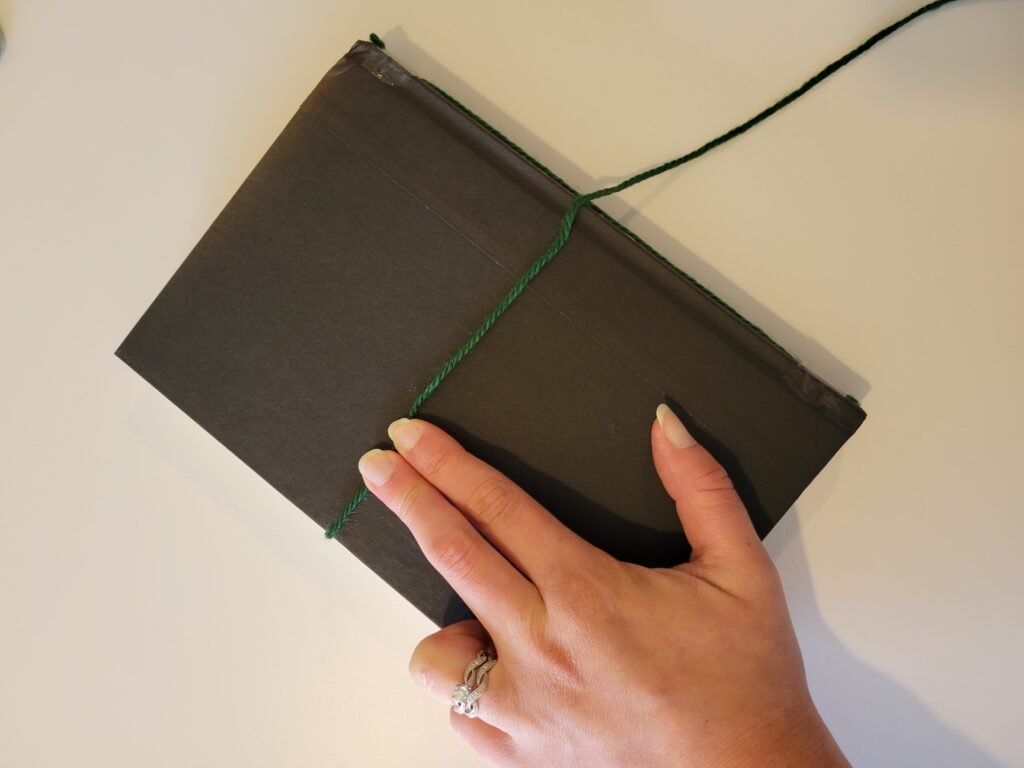
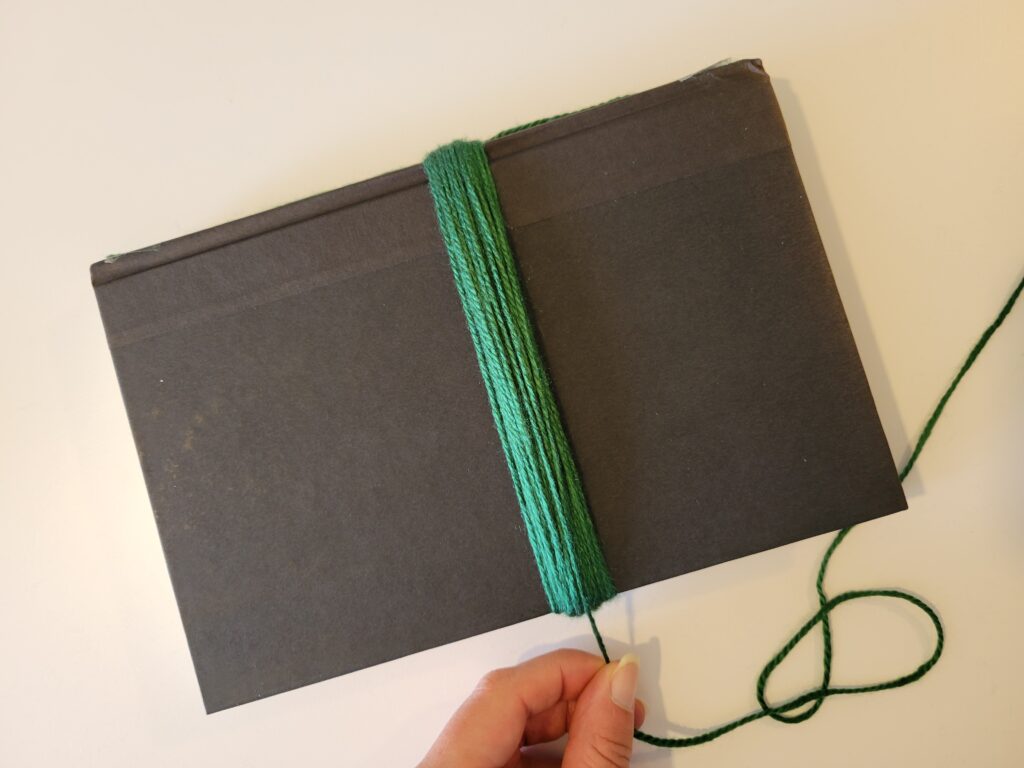
3-Take the start of your yarn and place it at the base of the book edge and in the center of the book. Hold it with your thumb and begin wrapping the yarn around the width of the book in about the same spot each time. I wrapped mine around 40 times but how many times you wrap around will also determine how thin or thick you want your tassels to be.
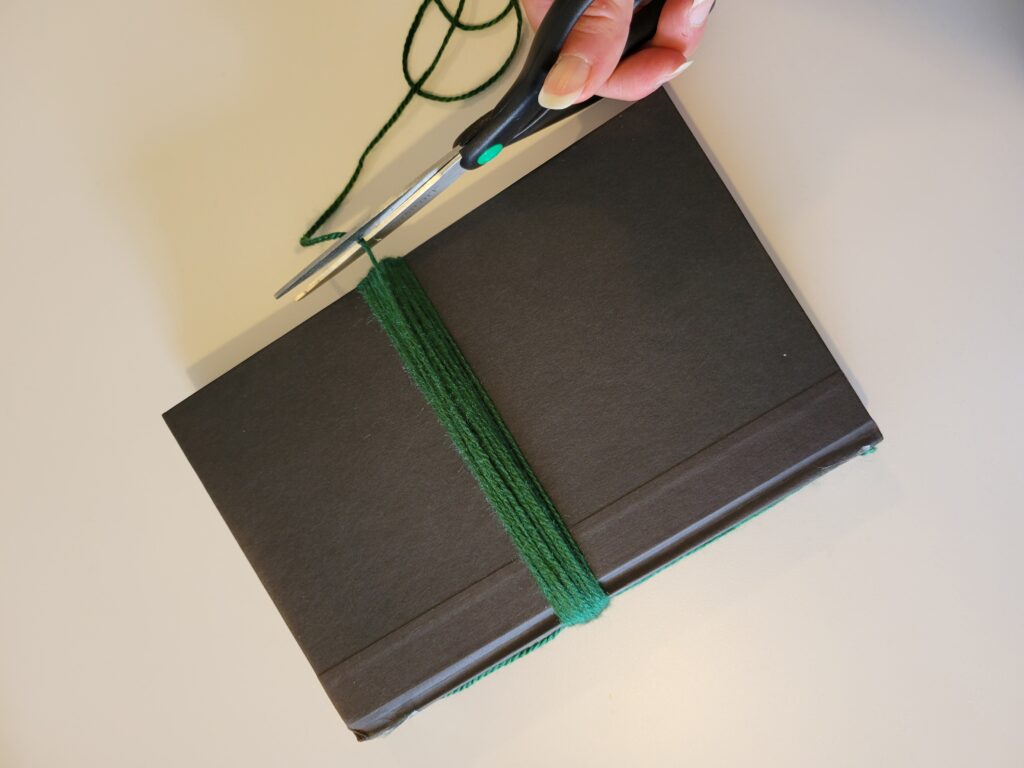
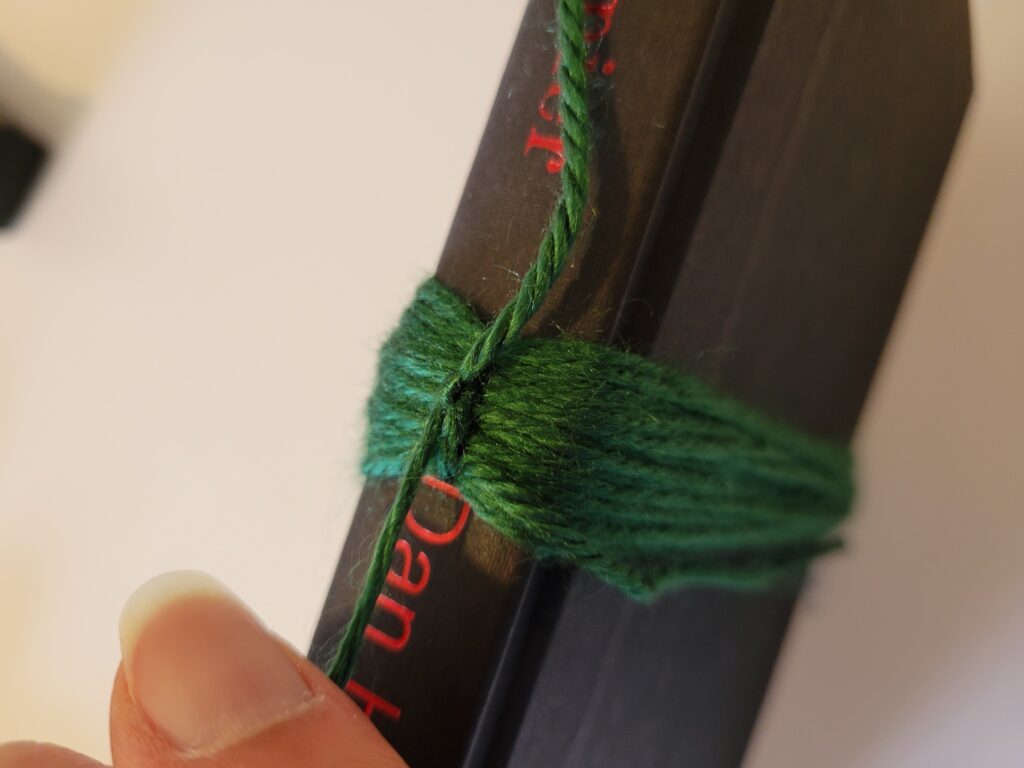
4-Cut the yarn at the base of the last wrap (the book edge). Then undo the two taped edges and tie this twice around the wrapped yarn. Make sure it’s as tight as you can get it!
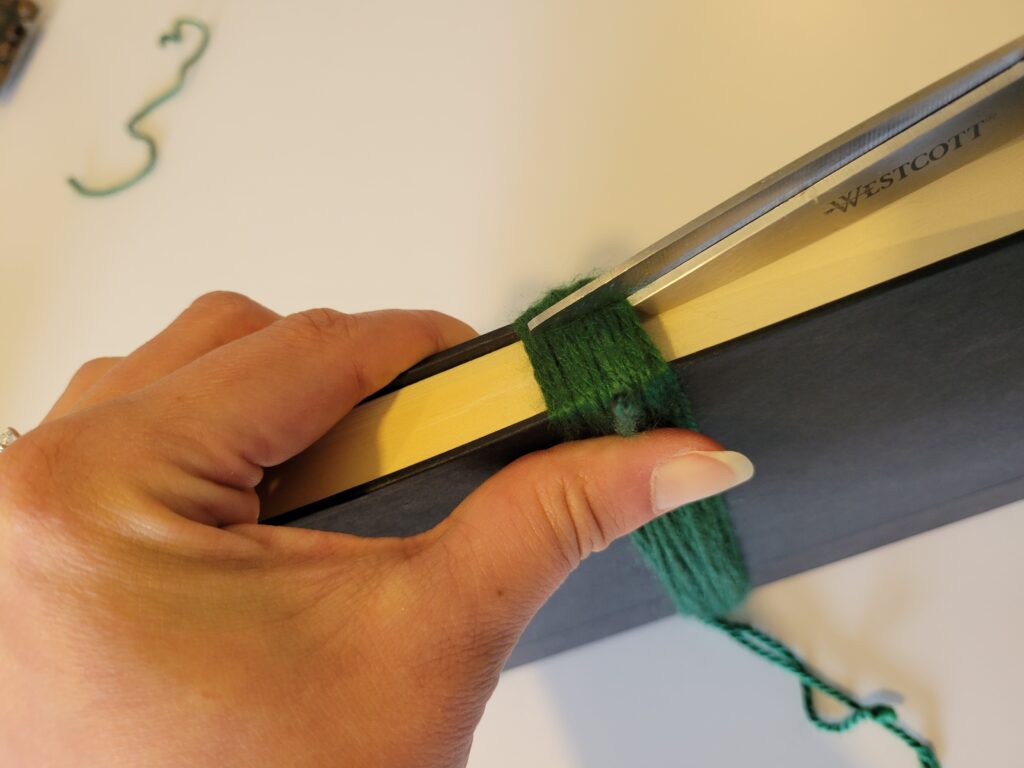
5-Next, take your scissors and cut in the middle of the wrapped yarn at the book edge or the “bottom” of the tassel.
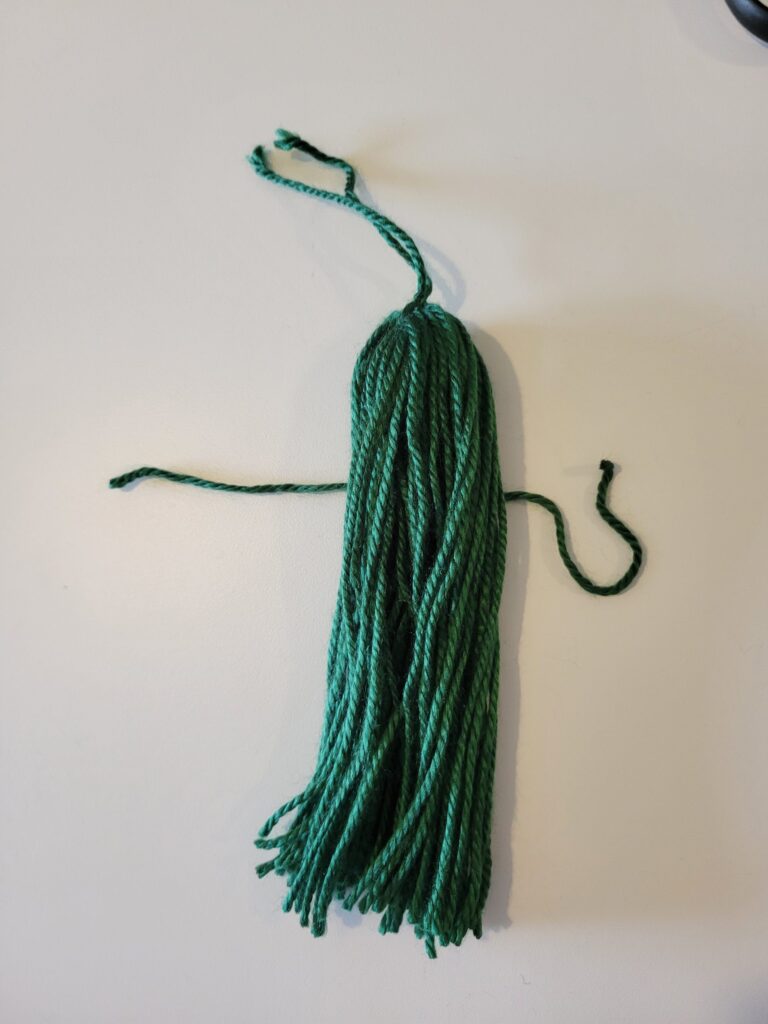
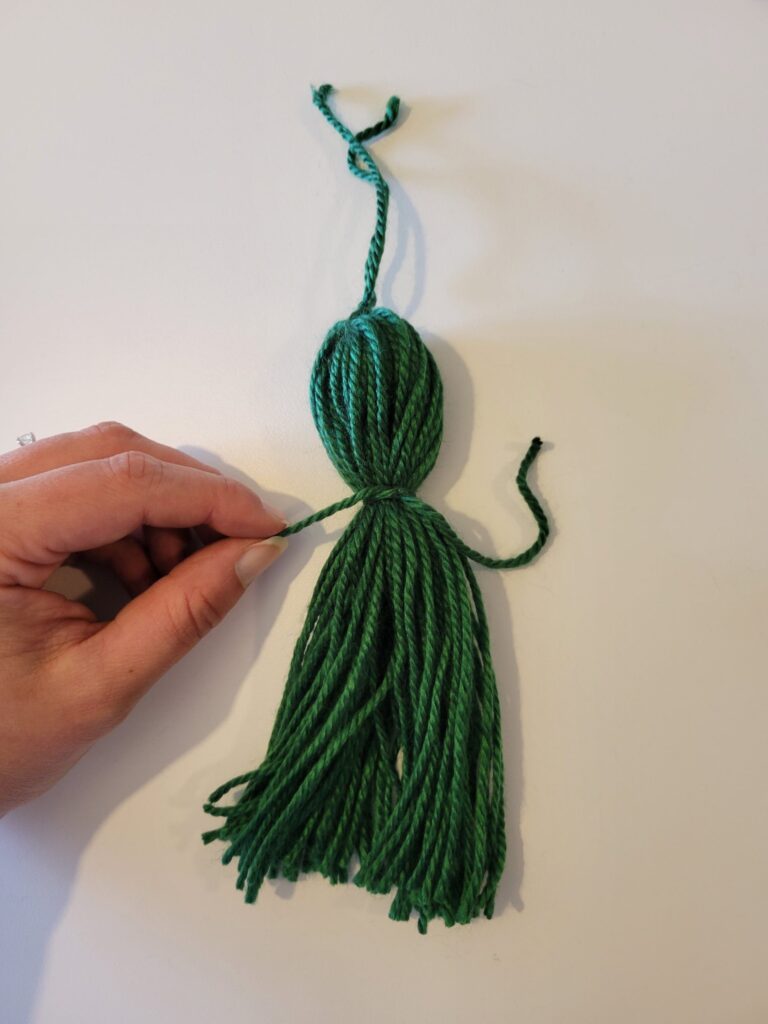
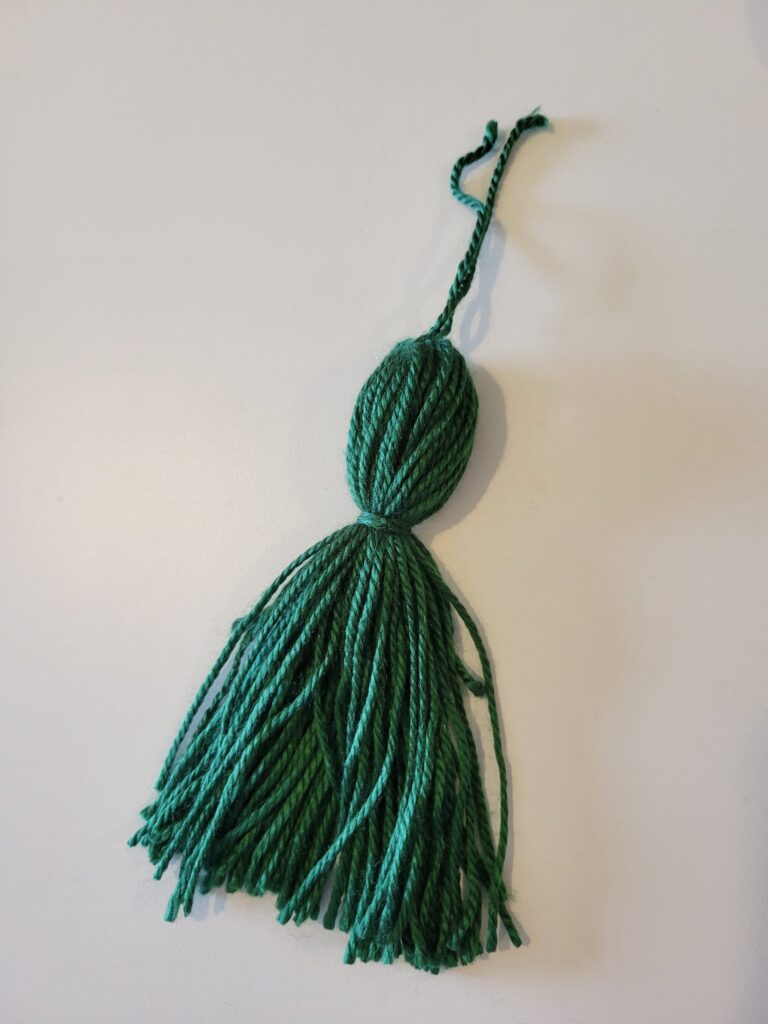
6-Lay your tassel on your working surface and take a second piece of yarn (or, the pieces you trimmed out earlier in step two!) and tie it around the top 1/4th of the tassel.
7-Once all your tassels are assembled, cut a string to the full length of your desired project.
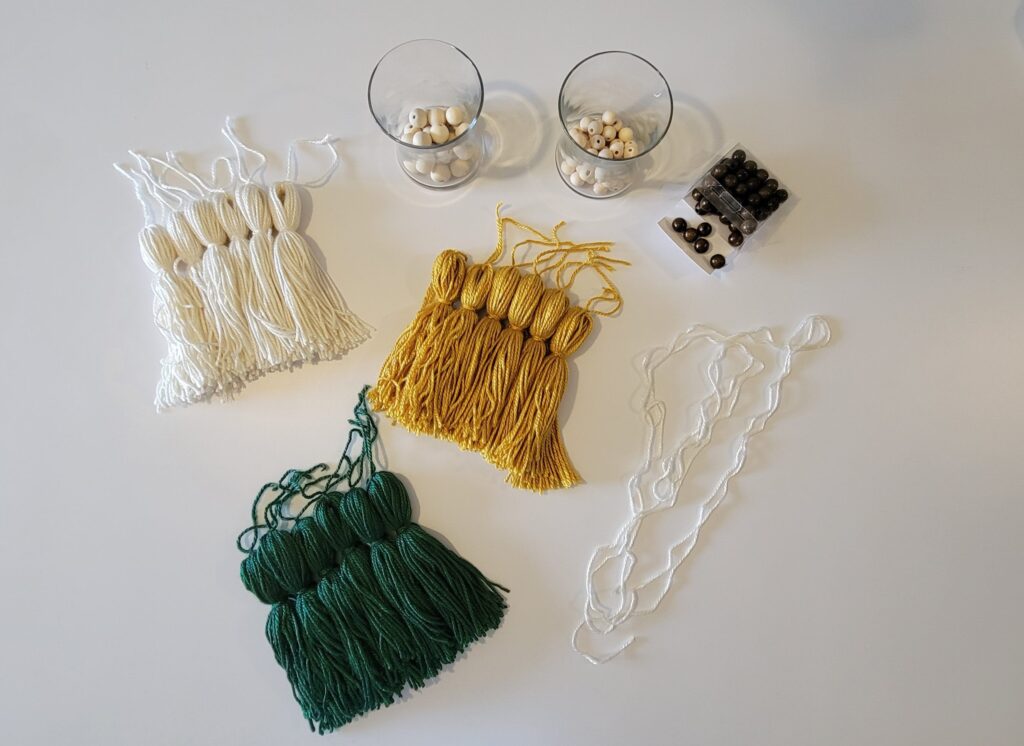
8-Depending on if you are starting with a tassel or bead, start attaching them to your string in the order you designed in the beginning. I used a needle to thread the yarn through to make it easier to feed each bead onto the yarn to prevent it from fraying too much. Continue this step until all your lovely tassels and beads are attached!
9-Hang in your chosen location and ta-da! How beautiful and fun was that? 🥳
Did you complete this project? Comment below or tag me on Instagram, @helloblondemoments, to share the love!

[…] number 3 of 4 for our sweet boy’s nursery! Missed the first two projects? You can find them here and […]
[…] Introducing project number 2 of 4 that I am decking his walls with! Missed out on project number 1? Check it out here! […]